What is a Dutch Oven?
It’s basically a handy, heavy duty pot with a lid. Dutch Ovens have been used for hundreds of years and have proven to be an essential, versatile item for most of those. They come in different sizes and depths as well as different types such as a home Dutch Oven and a Camping Dutch Oven.
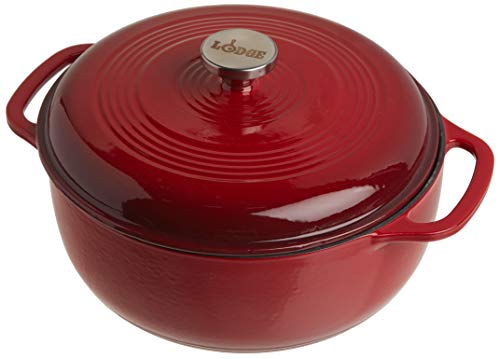
The Home Dutch Oven comes with a flat bottom and is usually sealed in enamel. Popular brands include Lodge, Le Creuset, and Staub. Home Dutch Ovens are designed to be used inside on the stove or in the oven. They are not designed to used in an open fire.
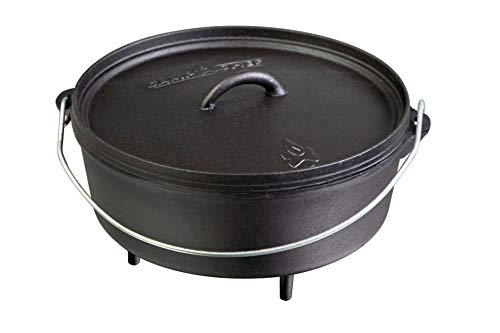
A good Camping Dutch Oven is made entirely from cast iron. They have support legs on the bottom that raise the oven off of the ground. They also have flat, Flanged lids that create a seal on the oven. Popular brands include Lodge and Camp Chef. Camping Dutch Ovens are designed to be used with charcoal and embers.
The Anatomy of a Dutch Oven
The anatomy of the Camping Dutch Oven consists of a handle, a lid, the body, and the legs. The handle allows for easy handling (Ha, no pun intended!) such as picking it up and moving it. The handle also allows the Dutch Oven to be hung from a tripod over an open fire. The lid is flat with a raised rim. This prevents charcoal from rolling off and it also keeps ashes spilling into food when removing the lid. The lid usually has a small loop handle that can be used with a lid lifter.
The body is the pot section of the oven where the food is cooked, and has small legs on the bottom that raises the oven off of the ground. Having it raised allows for air circulation, and more even cooking. Consider investing in some trivets, tall and short. The tall trivets are good for cooking pies, cakes, brownies, and foods that need to bake slowly. The short trivets are better for baking potatoes, casseroles, meats, and foods that can be stirred.
How to Use a Dutch Oven for Cooking
When cooking with a Dutch Oven, one of the biggest mistakes is sitting the oven on the coals. Don’t put the coals directly under the bottom. Instead, build a ring of coals around the bottom of the oven. If the oven gets too hot, simply distance the coal ring from the pot. Cover the top with a solid layer of coals on top. The top is the easiest part to cook since you can see it. If your food is cooking unevenly, move the heat around to focus it where it’s needed. If your cake is jiggly in the middle, move the coals closer to the middle to help that part cook faster.
Heat rises and the Dutch Ovens need less heat to cook because the cast iron will work to disburse the heat evenly unless the coals are directly touching the pot or focused in one area. When removed from heat, the Dutch Oven does well to retain its heat, but that also means it’s still cooking the food when you remove it from the heat source. To even out hot spots, help the food cook more evenly, rotate the Dutch Oven one direction and rotate the lid the opposite direction periodically.
If your food is cooking too hot, too fast, set it off of the heat for a little bit. You can always add more heat, but you can’t take the heat back once your food is burnt. You can use a Dutch Oven to simmer, boil, sauté, sear, bake, and cook foods in many other ways. Wind can be a challenge when cooking outdoors. If you need to, create a wind barrier to help.
How to Clean it
Never use metal on your cast iron when cooking or cleaning. Use a plastic, rubber, or wood scraper to get excess food off. Always season your cast iron every time you use it. To season it, preheat the oven to 350 F, and place the pot and the lid in the oven. Remove both from the oven when they’re almost too hot to handle. Once you remove them, use a bandana or a lint-free cloth to spread a thin layer of oil over all of the surfaces including the legs. Use vegetable oil, olive oil, or shortening. Do not use butter, margarine, bacon grease, or spray oil to season your cast iron.
After the Dutch Oven and the lid are coated in oil, place both back in the oven on the top rack and put a pan underneath on the bottom rack in case the oil drips. Bake for one hour, then turn the oven off and leave the Dutch Oven to cool. Once cooled, remove it and wipe it clean with a bandana or a lint-free cloth. Repeat the process, if necessary.
Cast iron will darken as it’s used and as it’s seasoned. Never introduce cold water to a hot pot and vice versa. Doing so will damage the cast iron. If it’s rinsed, or if it comes into any other contact with water, make sure to dry it really well to avoid rust.
Accessories
Don’t forget about the accessories! You can get many accessories that can make your time using a Dutch Oven much more enjoyable and less stressful. Some accessories you can check out include a lid lifter, heat resistant gloves, long, metal tongs, a thermometer, and parchment paper for when you need a liner.